Satisfying your Accessory Sweet Tooth: Arm Candy [How to]

Everywhere you look, i’m sure you have noticed the colossal amount of bracelets, watches, chains and spikes adorning the arms of fashionistas. This gaudy arm fad is affectionally known to us as: ARM CANDY. Every time I go shopping, I am looking for cute, simplistic pieces that I can pile on to my arm candy family.

For those of you just tuning into the trend, I have decided to make this a “how-to” post to make it easier for you to build an arm party of your own by showing you how I construct mine.

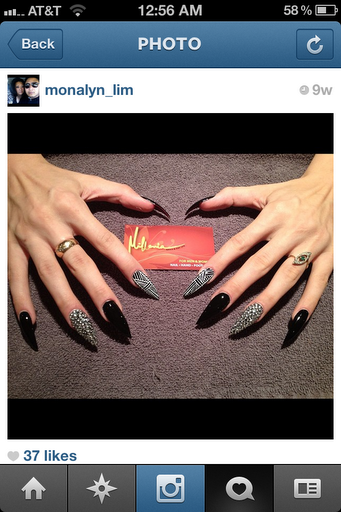
First, here are a couple of variation of looks that I have done recently:

The one that we are going to work with in this post is the last photo.

The core of this arm candy ensemble is my Burberry Nova Check Watch : $395. However, any watch will do:

Then, I add my Spiked bracelets: $12.00 for both, which I just purchased from ALDO last week. I always place one above my watch and one below my watch.

Next, is my metal spiked bracelet: $7.99, which I purchased from “Fancy Q” in Arundel Mills mall. It’s starting to fade, but I can’t let it go. I had a gold one also, but Eura stole it. Anyway, I put this one at the very front.

Last, but not least, my braided J.Crew bracelet: $22.00. I always place her somewhere near the front.

Here’s a reminder of the final product:

That’s it! It’s so easy and really fun to see what kinds of combinations you can come up with. Also, if you don’t have a watch, you can use a statement bracelet as your core piece:

In my case, we will take my new chunky chain link bracelet from Express: $24.50

Just add a few of the previous pieces and it could turn out like this:

Or this:

Don’t know where to start, not a problem! Here is a list of great places that can help you start building your arm wardrobe across all price points:

Marc by Marc Jacobs Collection

Arm Candy Shoppe

Etsy: Arm Candy Search

Fancy Me Candy

Aldo Shoes: Bracelets

J.Crew: Bracelets

Express: Buy One Get One 1/2 off Promotion

That’s all for now, have an awesome time building your own Candy Shops.

XoXo, Jada

UPDATE: One of my readers, Sharnell, sent me a photo of her Arm Candy hookup! I’m loving her Betsey Johnson watch!

DIY: Funky Nail Styles

Hey honeys!

So, I was recently on InstaGram (IG) and I saw this amazing nail salon that is unfortunately located all the way in Orlando, FL. I am so impressed by their work that I am considering making them a must-stop on my next trip to the Sunshine State. They inspired me to get my nails done and to see if one of the shops here in Baltimore could, possibly, replicate the design.

Here is an image that I snatched from the IG page Monalyn_Lim. You can also visit their website Here.

I INSTANTLY fell in love with the pointer finger pattern. I thought that it was chic, simplistic and I needed to have it!
So, I visited one of the nail salons near me. My experience wasn’t that great in that my nail technician didn’t make my nails long enough or pointy enough, but I was willing to accept that and let them just grow out.
When my designs were done, I was pleased with the work, however, it wasn’t “exactly” what I wanted:

So, I took it upon myself to head to my mom’s salon and re-do them myself.
First, I practiced on a nail tip, just to see if I could get a bit of practice in on the pattern.
 My design didn’t come out EXACTLY like the one from Millenia, but I was pretty pleased with the outcome.
Then, it was time to try it out on my nails. I removed the previous design and gathered the following materials:
Nail Paint: I didn’t have white, so I decided on silver metallic
A paint brush with a few of the bristles removed to produce a collection of fine strands:

A bowl of water:

 China Glaze “Liquid Leather” nail polish

And finally, a paper towel for the paint:
A placed a dot of paint on the napkin and lightly slid the brush through the paint and began placing lines everywhere in a symmetrical fashion. That’s it! it only took about 10-15 minutes, tops! When I was done, I went over the designed nails with OPI Top coat, and Viola!
The finished product:

I was so happy with the final turn out that I added a stripe effect with taupe paint on my pinky nail:

That’s about all for this DIY tutorial. If anyone decides to try out this or a similar pattern, let me know so that I can post your photos as updates to the post. Until then….
XoXo, Jada.